How to do a Kid's Manicure
Introducing your child to the world of manicures can be both a fun and exciting experience. Not only will it introduce them to good habits, but it can also be a great activity that you can do together. With the right tools, setting up for a manicure is simple and easy.
Setting Up For A Manicure
The first step in doing a kids manicure is gathering the necessary tools. Taylor Made Polish's Organic Manicure Set is perfect for this occasion as it includes everything you need for a safe and healthy manicure. It comes with an organic hand scrub, organic cuticle oil pen, manicure method guide, soy nail polish remover, lint-free organic cotton remover pads, top coat, glass nail file, cuticle pusher, and a vegan leather clutch. The kit includes everything you need to give your child the perfect mani at home using all organic ingredients in less time than it takes to get to the salon!
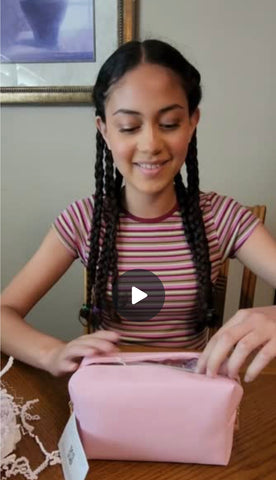
Want to see our set in action? Check out our Kids' mani model, Analisa take you behind the scenes here!

Steps to Giving a Kids Manicure
Step 1: Remove any existing polish on their nails. We recommend using our Soy nail polish remover with our lint-free cotton pads because it’s safe for all ages, non-toxic and odor free.
Step 2: Prep the cuticles by applying cuticle oil to each cuticle and letting that soak in for 1-2 minutes.
Step 3: File the nails to clean up the shape of each nail. If you want to remove length from the nail, we recommend using the nail clippers first, followed by the nail file just for shaping. File in one direction as opposed to back and forth.
Step 4: Gently push back each cuticle with a cuticle pusher or your thumb. We don't recommend cutting the cuticles, and with the regular use of our cuticle oil, you shouldn't need to!
Step 5: Take a hand scrub to massage the child’s hands, fingers, nails, and cuticles. Rinse well. Make sure you dry their hands very well after rinsing so the nails are dry for the best possible polish adhesion.
Step 6: Polish the nails! We recommend 1-2 coats of nail polish.
Step 7: Applying a top coat is optional. This is only needed if you want the nails to be extra shiny! If they’re getting a bit antsy or don’t want to wait for a topcoat, they don’t need to. With Taylor Made quality nail polish long-wearing is attained with polish alone!
Step 8: This is the final step and one you should repeat daily. Apply cuticle oil to your cuticles and surrounding skin. This extends the life of your manicure by keeping the nails moisturized.
Manicure Schedule for your Child
It is important to keep up with regular manicures in order to keep nails healthy and looking their best! Depending on how quickly your child’s nails grow out, we recommend scheduling a manicure every two weeks or so in order for them to stay looking their best! This is a great way to teach your child valuable self-care habits and a wonderful way to spend one on one time with them.
Enjoy the bonding experience and most importantly, have fun! Remember, adult supervision is necessary throughout the process, and the products mentioned are safe for kids but not intended for their unsupervised use! Ensure a safe and enjoyable experience for both you and your child.
For more detailed guidance on the manicure steps, you can check out Taylor Made Polish’s manicure steps tutorial on YouTube. With the Organic Manicure Set and the step-by-step instructions provided, you can give your child a fabulous manicure right at home.
Remember to prioritize your child’s safety and enjoyment during the process. Happy pampering!


