


Hey there, nail art enthusiasts! We've got something really special to share with you today. We're about to take a walk down memory lane, revisiting the all-time favorite French manicure. But we're not just stopping at the classic—we're giving it an ultra-modern, edgy makeover with a V-tip design. Yes, you heard it right!
This trendy new take on the French manicure is not only chic and stylish but also simple enough for even nail art beginners to try at home. So, grab your favorite nail polishes, find a comfy spot, and let's get started on this nail art journey together!
Preparation: The Secret to Perfect Nail Art
- Begin with your left pinky. Take our Clear Top/Base Coat, and carefully apply two even coats on your freshly cleaned and filed nails. This high-quality base coat not only provides an excellent canvas for your nail art but also protects your nails from any potential damage.
- The best part about our Clearly On Top base coat is its quick-drying formula. That means no more waiting around for ages with your hands in awkward positions. In just a few minutes, your base coat will be perfectly dry, and you're ready to unleash your creativity with colors.
- Once the base coat is dry, it's time to bring on the color. Starting again with your left pinky, you'll be working your way to your thumb. This systematic approach helps keep the process organized and less messy.

Designing the V-Tip: Adding the Edge
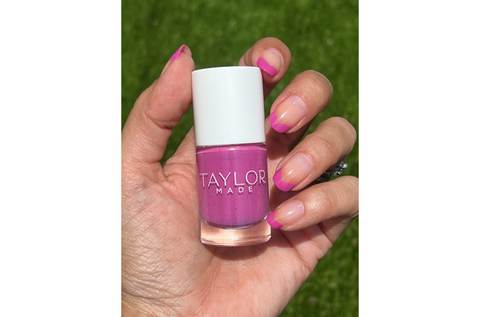
- Now, for the fun part! Pick a nail polish color that speaks to you. Maybe a vibrant pink for a fun and girly look, or a bold purple for an extra edge? We used "Revenge Nails" pink that was created with our Red | Pink | Purple Custom Nail Polish Kit. Once you've chosen your color, dip the brush into the bottle and then slowly paint a diagonal line on your nail. Start at the side edge and swipe the brush at an angle, ending in the middle of the nail. Repeat this on the other side of the nail, creating a chic "V" shape at the center.
- Don't worry if things get a bit messy—we've all been there. For any little mistakes or polish spills, our Clean Up Brush and Dish are here to save the day. Paired with our eco-friendly Soy Nail Polish Remover, you can easily clean up any stray marks and perfect your V-tip design.
- Once you've created stunning V's on all your nails, it's time to seal your work of art with a top coat. This step is key to ensuring your nail art lasts longer and stays shiny. Remember, swipe the end of the nail with the top coat to seal the edges and prevent chipping.

Get Inspired, Have Fun, and Share Your Creations!
And just like that, you've created a trendy V-tip French manicure right at home! If you prefer visual guides, we have a step-by-step video tutorial available here (insert IG video link) that you can follow along.
We hope this tutorial inspires you to try out new designs and express yourself through nail art. Remember, practice makes perfect, and the most important part is to have fun with it! We can't wait to see your gorgeous V-tip French manicures. Don't forget to share your creations with us and tag us in your photos.
Keep experimenting, keep shining, and most importantly, stay polished, nail art lovers! Until next time!


